
A Simple Halloween STEAM Project Your Kids Will Love: Spider Web Salt Painting Activity
If your kids have been wanting to try a salt painting activity, you've found the perfect project! This salt painting activity transforms a glue Halloween spider web into a magical opportunity to learn, explore, and create.
Whether you're planning Halloween activities for October or just need a rainy day project this Fall (or any time!), salt painting combines so many skills and learning concepts while making it festive and fun!
What Makes Salt Painting Such a Perfect Kids Activity?
The Magic of Process Art
Here's what I've learned after years in education and watching my own three kids create: salt painting is the ultimate process art activity because it focuses on the experience rather than a perfect finished product. When your child watches watercolor paint magically spread across the glue design, they're observing cause-and-effect in real time.
This salt painting technique naturally teaches patience (waiting for glue to dry), fine motor control (squeezing glue bottles and dabbing watercolors onto the salt), and color theory (watching colors blend) - all while your child is just having pure fun making art!
Why Kids Can't Get Enough of Salt Painting
The satisfying sensory experience of salt painting keeps kids engaged longer than many other activities. There's something absolutely mesmerizing about tapping their watercolors onto the glue-and-salt design then watching the colors spread through the salt crystals.
My kids literally gasp every single time! This reaction -while adorable! - is also your child's brain making connections about absorption, saturation, and how different materials interact.
Perfect for Multiple Ages and Skill Levels
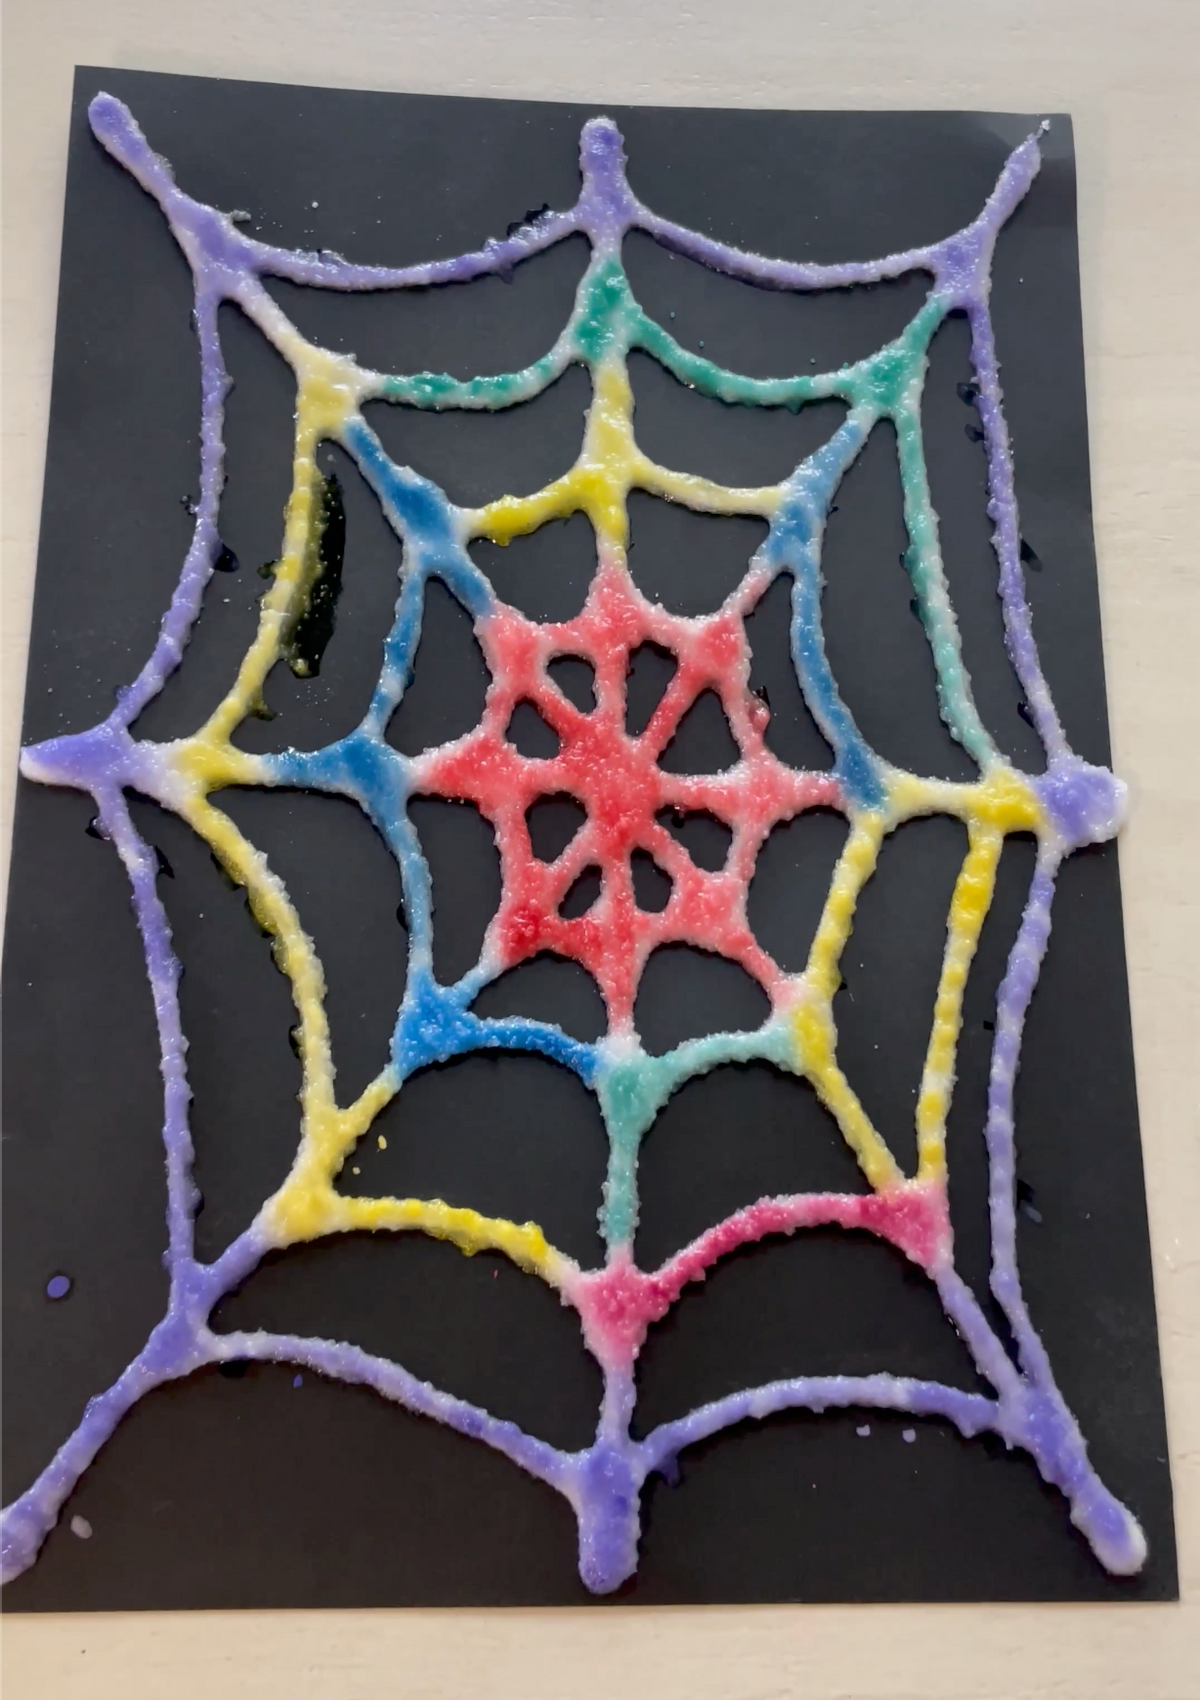
One reason I recommend salt painting constantly to other moms is its incredible versatility. Your 2-year-old can make random glue squiggles and pour salt (with help) while older children can create their own intricate Halloween salt painting designs: a spider web, a ghost, maybe even a pumpkin shape!
Everyone can create at their own level using the same basic salt painting supplies, which makes it such a great Halloween activity for families with multiple children!
Halloween Spider Web Salt Painting Supply List
Must-Have Materials
- Sturdy paper - cardstock or watercolor paper are ideal to support the weight of the glue AND they won't curl when wet
- White glue (washable school glue works perfectly)
- Table salt - regular iodized salt from your kitchen. You could also use fine sea salt, but anything coarser will affect how the colors spread
- Watercolor paints plus a cup of water
- Paintbrushes or droppers for applying paint
- Shallow tray, lipped baking sheet, or dish
Optional Add-ons:
- Glitter (just a little bit!) added to the salt for extra sparkle
- Colorful glue instead of white glue
- Black cardstock to make a vey dramatic Halloween salt painting
- Droppers with cups of water mixed with food coloring
Spider Web Salt Painting: Step-by-Step
Step 1: Make Your Glue Design
- Place your paper in the shallow dish or tray.
- For Halloween salt painting, think pumpkins, ghosts, bats, or spiderwebs! You can really make any design you like though - a flower, hearts, spirals, etc.
- Squeeze glue from the bottle onto the paper and make your shape or pattern
- Keep glue lines thick - thin lines will not hold enough salt
- You can fill shapes or outline them - both techniques create beautiful salt painting results!
Step 2: Add Salt
- With your paper in the tray, generously sprinkle salt over the entire glue design. Make sure every glue line is completely covered with salt!
- Vertically lift the paper above the tray and gently shake or tap to remove any loose salt.
- Place your paper on your work surface and toss the excess salt. Place your paper back into the emptied tray.
-
Optional Dry Time! Have your kids wait a few minutes for the salt to dry into the glue; it's a great practice in patience or a time to have your kids help prep the watercolors and water cup. The salt painting activity still works great, even without the dry time though!
- Slightly dried glue helps salt art colors stay more defined
- Wet glue creates more dramatic color spreading in salt painting
Step 3: Let's Salt Paint!
Get out your watercolors and create! Here are a few different methods for your child to try out
Paint Application Methods:
- Tap technique - use your watercolors and paintbrush to tap the color onto the salt, then watch the color travel through the salt crystals!
- Brush painting - gently brush across the salt
- Dropper method - use eyedroppers and water mixed with food coloring for another way to explore salt painting!
Salt Painting Educational Benefits
Fine Motor Skills Development
Salt painting naturally builds essential fine motor skills:
- Glue bottle squeezing strengthens hand muscles needed for writing
- Pincer grasp practice when sprinkling salt develops finger control
- Hand-eye coordination improves through careful paint application
- Bilateral coordination when using both hands together as they shake off excess salt
Science Learning Through Salt Art
Every salt painting session is a hands-on science lesson!
- Absorption - watching watercolors soak into the salt and glue
- Capillary action - colors traveling through salt art crystals
- Color mixing - observing how watercolors blend
Creative Problem-Solving Skills
Salt painting encourages natural problem-solving and experimentation:
- Planning designs before beginning their salt painting
- Deciding color placement in salt painting
- Adjusting techniques when results surprise them
- Learning through trial and error
Why Salt Painting is a Fantastic Halloween STEAM Activity!
After doing countless salt painting projects with my own kids and recommending it to hundreds of moms over the years, I genuinely believe this process art activity deserves a regular spot in your creative routine, especially if you're looking for an enriching and versatile Halloween STEAM activity!
Salt painting delivers that perfect combination of simple setup, engaging process, and impressive results that keeps both kids and parents happy.
The fact that you can adapt salt painting for any theme - like Halloween activities this Fall - means you'll never run out of fresh ways to approach and use this technique! That's the beauty of process art - it meets every child exactly where they are.
Start with basic salt painting supplies you already have, embrace the mess, and watch your child's face light up when those watercolors start spreading through the salt. That moment of wonder? It never gets old, no matter how many times you've done salt painting together!
Disclaimer: This post may contain affiliate links. If you purchase through these links, I may earn a small commission at no additional cost to you. All recommendations are based on items I personally use and love with my own children.

Written by Brittany, Stay at Home Activity Mom
Brittany is a former elementary school teacher turned stay-at-home mom of three. Passionate about children learning through play, she began sharing her simple, hands-on, and education activities on her Instagram @stayathomeactivitymom so that other parents could see how fun this type of at-home learning can be.


